So I thought when I do finally get some decent photos I might want some colour in them, so I have done a trial with false colour images. I have some colour filters for my camera, and took 4 photos of Beetham Tower in Manchester (Our only skyscraper). These images were then converted to black and white (to ensure i didn't accidentally pick up any other colour (the blue was letting a lot of red through too), then colourising them (which is what you see above). Then I aligned the images and mixed them (picking the levels by hand) the image above can be seen as the result (the trees are a bit crappy as they had moved in the wind between replacing the filters. As you can see the result look quite good. I was actually surprised, because I was expecting it not to look real. I imagined that false colour images of space weren't a true representation of colour, but as this test has show, it looks pretty good. (All I need now is to try the same thing with a hyrdogen alpha filter, I don't think the results will somehow be the same) :)
Incidentally, I tried swapping some of the colours around. This image is using red on the blue image, blue on the green, green on the yellow and yellow on the red.
Sunday, 30 January 2011
Saturday, 29 January 2011
Jupiter
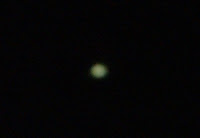
So here is my first image of Jupiter. It just looks like a fuzzy blob to me, it is probably out of focus, and I took it indoors through double glazing, so I wasn't expecting much. This is the best of many images. I have attempted to stack the many images that I got, but they all turn out looking the same, like little fuzzy blobs. Bahtinov Mask next I think!
Focus
I have now found out every astro-photographers crux is focusing. The camera I am using "Fuji FinePix S5000" is a bridge camera with a fixed lenses. It is designed to be used in auto-focus mode, although there is a 'manual focus' feature, which can be achieved by pressing buttons. This is difficult to use as the image displayed on the cameras screen is too lower resolution to allow correct focusing. The first image is the cameras auto focus with the image zoomed out completely. It is not unsatisfactory (minus the slight visual distortion in the center), but this camera sports a 10x zoom. When used to it's full extent then auto focus fails to work, and the best manual focus I could get can be seen on the second image (on the right). I have been advised that a good way to achieve focus is with a "Bahtinov Focusing Mask". So I will be making one of those shortly.
Attaching the camera
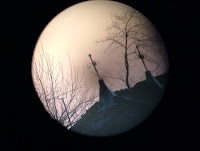
So after my last attempt of holding the camera to the eye piece provided somewhat shaky results. So I decided to get a t-mount, which is just a piece of metal that allows me to attach the screw thread of my camera directly to the telescope. I attempted a shot in the daytime to try and calibrate everything correctly before I begin. As you can see the results are somewhat odd. Everything looked OK until I pressed the shutter on the camera, and then this happened. I think what is happening is that there is more light coming from the edges of the image and not enough from the center. I guess this shows how an image will be distorted on the edges of the telescope. I guess that this can not be avoided, and what I have actually done is taken a picture of the shape of the mirror in my telescope. At first, this black blob looked like a shade on one side of the image, but careful collomating placed it bang slap in the middle. The reason that this blob isn't right in the middle is because of the weight of the camera. Remember as of yet I have the camera attached directly to the eye piece, and there is no structure to support the weight, as of yet. I believe that when I take a picture at night, this effect will not be so pronounced (enough that it will not be noticed)
Sunday, 16 January 2011
Jupiter on a cloudy evening
Spotted Jupiter tonight. It was quite cloudy, so hard to keep track of. Could just about make out Ganymede and a very small glimpse of Europa. Think I need to figure out how to set up the scope so I can track, only using the Right Assertion control. Again, this was from the flat through double glazing. It is amazing how you can not even touch the telescope or else the vibrations will shake the image so violently that you can barely make out what you are looking at.
Sunday, 9 January 2011
First Astronomy Photo
Telescope: 135mm Reflector, 10mm Eyepeice
Location: Out of my flat window
Saw the ISS with the naked eye and just about caught a glimpse of it through my telescope, could just about make out a little bit of structure.
Saw the satellite AJISAI (EGS) with the naked eye. Lovely deep bronze colour.
First Vega came out, then Alitair. Made out Cygnus, and about half of Draco. Eventually saw ε Peg (Nose of Pegasus). Later saw Juptier, and could make out Europa and Ganymede. Saw the moon, it was a waxing cresent, so could only see the edge, but managed to identify "Mare Crisium", "Mare Fecunditatis", "Mare Nectaris" and "Mare Tranquillitatis" (or "The Sea of Crises", "The Sea of Fecundity", "The Sea of Nectar" and "The Sea of Tranquillity". Also identified the Metius Crater" and the "Fabricius Crater". Camera: 3.2 MP Fuji S5000 held to 2x Eyepeice
Saturday, 8 January 2011
ISS with the naked eye
This evening, just as the sun was setting, I saw the ISS with the naked eye! Thanks to Twitter's @overmanchester
Subscribe to:
Posts (Atom)